Showing posts with label 1st grade. Show all posts

Wednesday, July 13, 2016

Van Gogh Sunflower Field

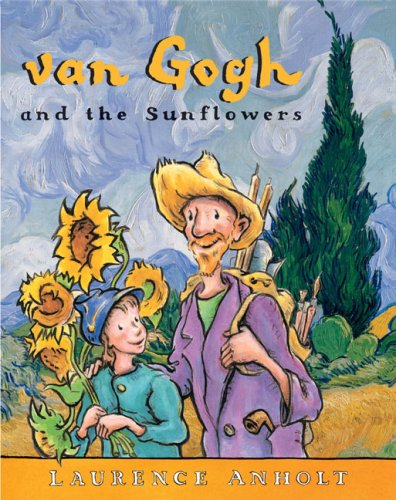
Van Gogh, a staple of the art room projects. For my interpretation of this magical man, we do a field of sunflowers. I start by reading my 1st grade the book "Van Gogh and the Sunflowers". We talk about what they see in the books design and how he was treated by the people. I actually read parts over the course of the project for it is a big long for 1st to hear in all one setting. 

But as we go through the project, I first have the students create a big sheet of yellow and red swirls. When it mixes it makes an orange and the swirls relate back to Van Gogh. We talk about his brushstrokes and not over mixed colors. 


Next we do the paper for the field itself. Pretty much the same as the orangey paper ( they do it on 18x12 white paper) but starting with blue and white that they paint onto the top half of paper folded hot dog style. We discuss horizon line and the paint not over mixed again. Once they are done with the blue I add some yellow for their grass. To add some texture to it with the help of a fork they scrap into the surface of the bottom half of the paper. 


Once all dry we get to cutting! I show them a couple of pictures of landscapes and ask them what they see happening to the size of objects in the picture. So I have them start with circles near the horizon line and get bigger as they get closer to the bottom. Last they can add some brown centers and white poofy clouds with the help cotton balls they rub over the surface. 


I found this project really fun and interesting to do near the end of the year and I used it as my final focus of my SLO (working on hand eye coordination). Hard part is really getting the students to cut the small circles, might try to have them use hole punches for the smalls. Works those muscles. 

Tuesday, May 3, 2016

Where the Wild Things Are

I do not know any art teacher who does not like "Where the Wild Things Are" Seriously. So I thought of a project to have my 1st experience it and have them focus on shapes, texture and a tiny bit of landscape developement/depth, with watercolor paints. 


To start we read the book and discussed the themes behind it. Next we observed the art style around it and what we noticed about the body designs of the wild things. Noticing the shapes and size and that there was texture. I had them example what would be good lines to use for textures and what they should include in their wild things. IE no robots? or pirates? Wild things are more like two animals put together. 

So we sketched and practiced with sketchbooks and white boards to help out. 


I really pushed for big! And to follow those shapes with texture. I had them draw them with pencil first then use crayons to do outline and just draw their texture. They asked why they couldn't color it in and I explained they will get to experiment with watercolor paints and they will discover something interesting about watercolor paints and crayon. And showed them pictures of the book pages again to understand they are on ground and the sky goes to that ground line. 


They had a ball with painting and I had them develop good habits of setting up their space and understanding how to do painting without smooshing the brush down. This was their first time with me using the big 16 count set. 

I would like to do this project again but really need to push more of the DO NOT color in idea. And have the animal mixed. I had a couple give their wild thing names so I might play with that more next time and have them maybe express an emotion and story about their wild thing after Max left them. 

Tuesday, April 12, 2016

Chinese New Year Dragons.


Yay for Chinese New Year dragons! I have lots of favorite projects but anything with clay is my jam. I enjoy this one because of the culture reference I can make to my students and having them learn about other parts of the world. I start by reading them the book "My first Chinese New Year" a nice little book that goes over some key factors of the holiday. Then I show them pictures of Asian inspired dragons compared to European inspired dragons. We compare and discuss what we see. Then we build!


To start, I give my students slabs of clay. Then they roll them up into coils or as they described them noodles, snakes, or worms. I have them lay their coil over a paper tube, sometimes with paper towel between. It makes putting away actually easier.  Next they pinch along the spine to make spikes for the dragons back. Then they break off a piece from the end and I show them out to slip and score. Yes, I show 1st how to slip and score. I show them how to make small coils and attach them to their dragon. 


The head is another piece they can just push in with their fingers and use a pokie stick to design or add on with slip and scoring. I tell them that if they don't slip and score, pieces fall off and their dragon is broken. But if it happens, just the way clay life is. 


After drying and kiln firing, we paint! I use watercolor paints and I show them more pictures of Asian inspired dragons to get the idea of colors. 


Monday, April 11, 2016

Wayne Thiebaud Cupcakes

Who doesn't like cupcakes?


For this tasty project, my 1st graders were inspired by the artist Wayne Thiebaud. In the past I have messed around with all different ways to do artwork based on him and this was my favorite so far. 

To start I have the students look at the artwork of Thiebaud and watch a little video about him. I have them discuss in a turn and talk about what they see in his artwork and what might be some good shapes to use to redraw what he did. Next we sketch and practice using oil pastels. I don't introduce supplies like oil pastels until 1st so it is a fresh experience. And I don't tell them what makes oil pastels so interesting to color with because I want them to discover it themselves. I even have them practice different ways to draw the cupcake. My requirements are that the cupcake cup have a pattern and that they say no to those scribbles. 

After some practice and we start the final. I have them use a sheet of 9 x 12  white paper to draw out their LARGE cupcake. I use my hand as a measure point for how big it should be. They then cut it out of the white paper and glue it down to colored paper of their choice. Some even decide to add little plates ( they figure out on own) or shadows. The shadows are thanks to our study into Cezanne awhile ago. 


Out of all the Thiebaud projects I have done, this has been my favorite. Not only allowing more creative ideas for how to draw it but the students really enjoyed how they came up with the steps. Plus who doesn't want to learn how to draw a cupcake. 


Monday, January 4, 2016

Group of Seven Landscapes

So after one of my 1st grade classes, their teacher informs me that they are studying maps and landscapes. She knew I like to integrate and wanted to inform me.

My brain went to work. I wanted to do something different and save some other landscapes I do for later in the year. After some digging, I discovered the group of seven. A Canadian landscape group of artists, who all had different styles and all painted the landscape of their country. PERFECT. Now the challenge of designing the project it self.

First step was having the kiddos paint the mountains I wanted to include, inspired by above. 


I have the students fold the paper in half to give us the horizon line and a line for the mountains. From here we discussed what would be a good line to use to make mountains, after I demonstrated how I did it. (Note above is a student one.) Once drawn, I had them go over the lines with black oil pastels, it offered a thicker line and gave them some experience in the medium. Next we painted and I stressed not painting the sky because we were doing something special later on. 

Next we added northern lights. I showed them some pictures of the night sky up there and how the artists were inspired by this as well. And showed them a video about northern lights. I asked what colors they saw and we went to work. 
For the northern lights, I used simple white chalk pastels with color on top. I stressed the importance of  going one direction with their blending or as I called it "wooshing" they had a lot of fun and really liked the effect. Once done wooshing, they simple cut their white sky out and glue their mountains onto their night sky. 


Tuesday, November 17, 2015

Bad Case of Stripes Self Portraits

I like to use book with my projects. Being at the elementary level really does help fulfill that. So with my younger students I try to go from book to artists to book with my project pattern. Sometimes even having a book about an artist.
For this project, I wanted to get them talking about patterns and being themselves. So I found Bad Case of Stripes and even a video on youtube of it being read. I play it for the students and discuss what it is about and the importance of you! 

Because stripes are discussed in the title, I also use it to discuss patterns. What makes a pattern? What has to happen? We compare patterns to non patterns and then design our own. Students have fun coming up with all these different ones. 

Next, the portrait time! I ask students "what is a self-portrait? Just from the name?"
This gets the ball rolling and I have them look at an example and discuss shapes they could use.
From here we practice practice practice! Being their first ones ( I don't do ones in kindergarten due to time.) 
EVEN breaking out the white boards to do practice on to really get those shapes we want. (Got them for $1 each at my local dollar store during back to school time. Best idea ever.)

Once my students just practice themselves, we combine the two. Self portrait and patterns! In another practice! (I am diabolical with using those sketchbooks.) 
I have them draw themselves three more times and then do a pattern background for each. If you are keeping track that is at least 6 drawings of themselves. 


FINALLY we start the final. 

Putting all this hard work and really showing we can say no to scribbles. 


Tuesday, October 13, 2015

Ce'zanne's Fruit Plate


This is a project I developed that focuses on the use of Paul Ce'zanne's artwork. It combines the use of color theory, shape building, paper cutting, art history, reading, and even some value understanding. 

I start each day with reading a little bit of...
(Note I think this is something I might change for next year due to how the students interacted with it.)

Now this is the first time I did this one so things can be fixed. 


To start students make mix red and blue to make purple and paint a WHOLE sheet (12x18). I do this first because it gets them in the habit of how to clean up after themselves and play with the brushes. 
And putting them away!

Next is orange and green. Which I have them again mixing the primaries to create that secondary but using one sheet for both. Working on developing folding (hamburger style is what I call it but otherwise known as book style) and brush control. 


NEXT we build! 

I talk to them about how Ce'zanne used shape to make his artwork and how they have to make a LARGE oval and medium circles for their "apples or oranges". Talking about what the difference between small and medium. I like to do hand/finger measurements so I say so be " bigger then three fingers wide, so if your three fingers covers it up..TO SMALL!"  But they get to decide if they are making apples or oranges and use the other color for the plate. 


I also discuss overlapping as well but I throw in some discussion of "shiny and shadows" with oil pastels. I demonstrate what to do for them and have the students tell/explain what I did. The shinny and shadow is more just a extra bonus design. But the main reason I do all this is to have them develop that use/ understanding of secondary colors and build on shape identifying within objects. Also the fine motor skills isn't bad either. 


Saturday, September 19, 2015

Paint time!

First projects are underway for just about all my grades. I will admit I take it a bit slower with my kindergarten just so they can get a feel for the room and procedures. BUT 1st grade got underway with painting and mixing colors!
1st grade will be creating a Paul Ce'zanne inspired fruit plate picture this year. 
Past years I have come up with a pumpkin and never really felt like.