Showing posts with label 4th grade. Show all posts

Thursday, January 26, 2017

UPDATE Chuck Close. New and improve?

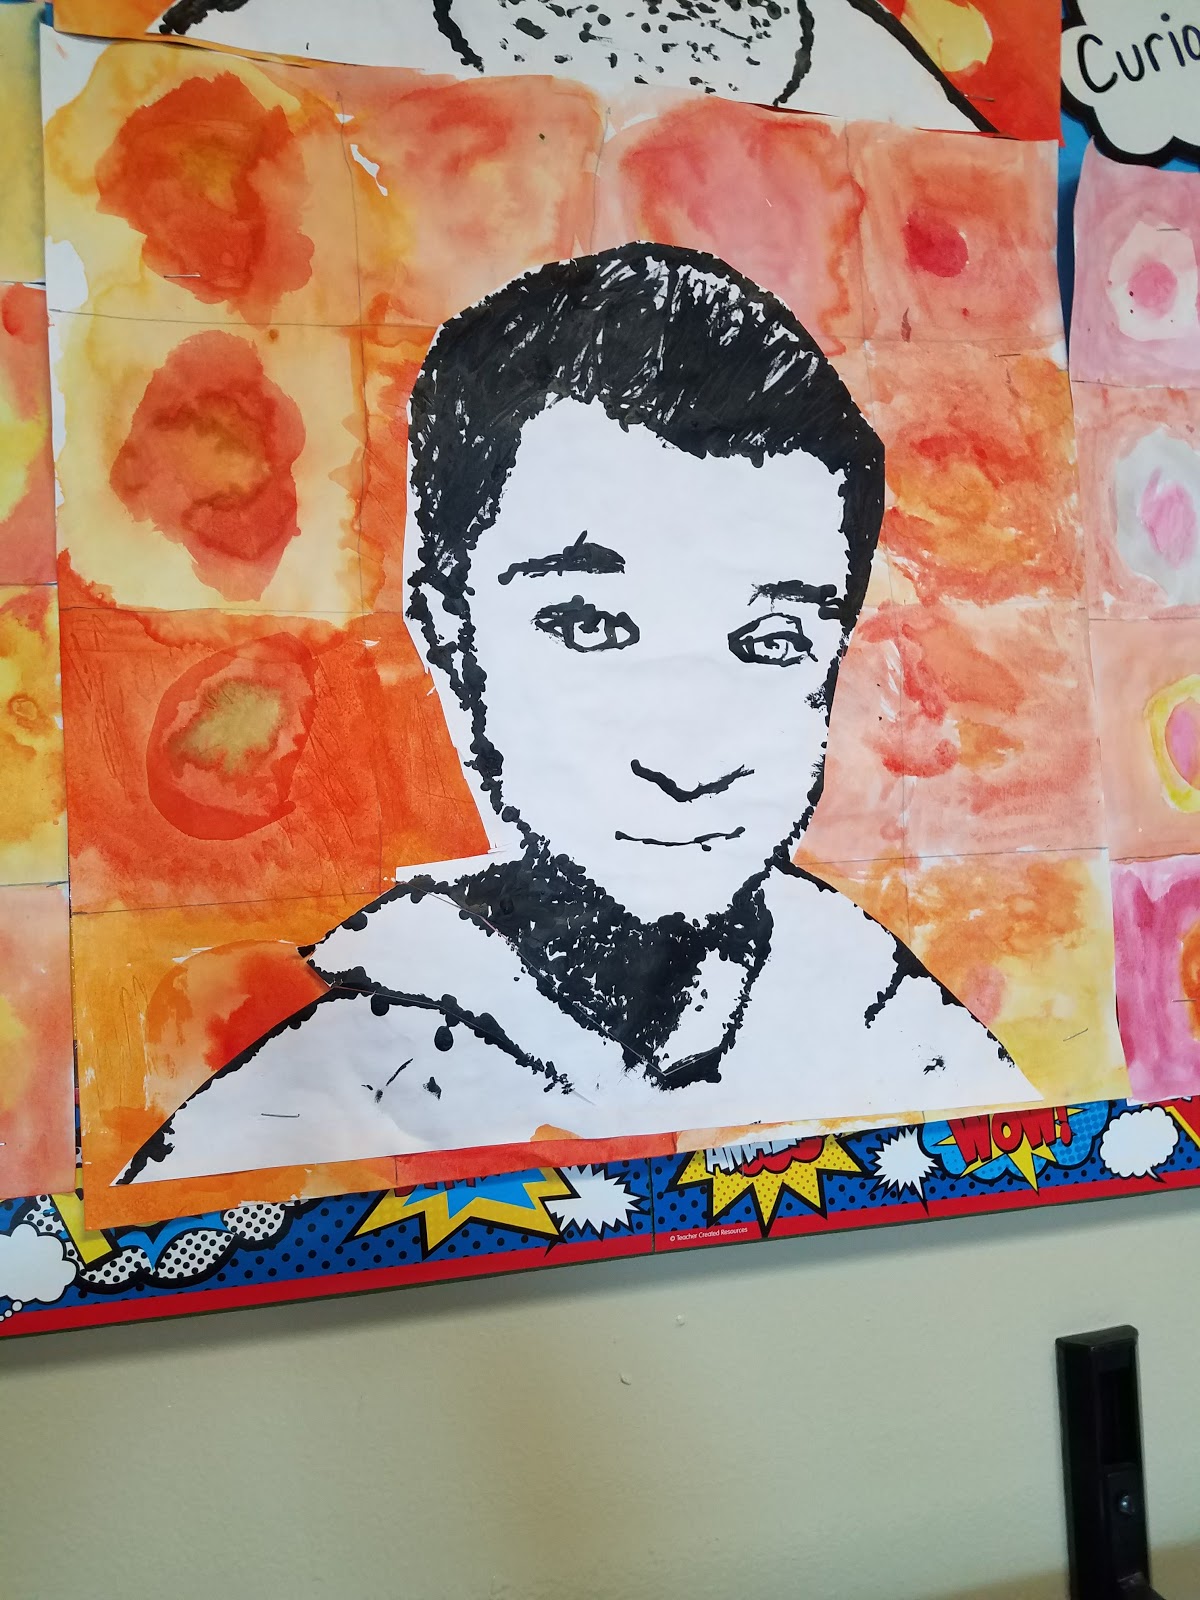
Chuck Close. We all know him and adore him. This year, decide to try something new with the "old hat". Really wanted to play with the idea of his bigger. 

Because I KNEW my students would have a hard time drawing bigger. Introduced them to the idea of tracing from the board. I gave them a 16 x 16 sheet of paper and had their pictures up. I would recommend if you do this, you can set up the document to show three at once, rather then two like I did. 

At the same time, those who were not up tracing, were working on this background. I introduced them to the idea of warm and cool and had them create a 4x4 grid on their 16x16 paper. I had them look at the work of Close and notice the use of the grid and colors within the background. 


AFTER tracing, it was dotting time. Due to, well, mess. I had them do dots with stylist sticks and black paint. Similar to Close's finger painting that he did to create his value. I had them practice value a head of time with dots. Creating a value scale with the dots. They also had a print out of their board picture to see the areas of value they could add. I said at least add the neck. 


The results. The only hard part the students had tracing was eyes and that was just due to the board and how it blurred a little with the screen up. I got SOO many complements from this project. 

Tuesday, July 12, 2016

Chihuly Danglers

I don't know many art teachers who don't know about Dale Chihuly and use his work in some way. With that said, I do this quick project with my 4th after the lengthiness of the one-point perspective This little project is about two to three classes.


So to start I show them a Dale Chihuly video on youtube and ask them to describe what they saw in his artwork. I try to get them to focus on color and light. From there we go into warm and cool colors and how these colors work good together. Along with shape of his work and flow of it. Next we start the project. I have them get at least five pieces of transparent paper and a pre-traced spiral and have them trace the spiral onto the transparent paper. Next I give them a choice between warm OR cool. And simply tell them to color it in. Now some students go about this order however they wish. Either tracing all and coloring or tracing and coloring one at a time. 

Once all colored, they cut them out along the spiral and hole punch the middle. Then taking a pipe cleaner, they use beads and construct the dangler. I tell them to put a bead at the bottom and twist the pipe cleaner around it and then layer the beads and spirals. I say bead x2 then spiral works good but no more then five beads between spirals. 


 A NEAT trick a student last year figured out was if you trace on one side and flip it over. You do not have to worry about smearing the colors. Pretty ingenious if I must say. 


Once done, I hang them up in the hall like so for about a week. I do like this project a lot for it is a nice little break and has problem solving and design challenges (what if the hole punch breaks the transparent paper). For next year I plan to re film my demo videos to include some tips and tricks such as the flipping it around. 


Monday, May 9, 2016

One-Point Perpsective Cities


One-point perpsective. A challenge in its own to even say. To teach, is a whole other ball of knots. I have taught one-point perspective for 4 years now. Every year, I change and adapt to the technology I have to do it better. This year was probably the best yet. 


So to start, I actually do a study on just the vanishing point and understanding that those diagonal lines go to the point. So we just do shapes the first day. And I show them how to cut them off before they get to the point. Which leads us to day two, city time. I go step by step on how to draw a city using one-point perspective as a group. 


Third day is where the fun really begins and I feel a huge jump in quality happened. CHROMEBOOKS! Thats right, I flipped the second half like a pancake. I put all my demo videos on screen-cast and provided a link to the students. This way, they can pick up where they need help on their own and go at their own pace or re watch steps over and over. Now this didn't solve all the problems but it helped. I love screen-cast because it also allows you around that whole youtube thing. 


But students got to use it for their sketching and then chromebooks again if they wanted to add references to items. 

Lastly, because these are cities they worked hard on, I had them do some writing on them. This time, rather then me trying to teach them and get them to write in art. I asked their teacher to do writing with them. Just gave the basic info on what I was looking for in it. SOOO MUCH BETTER! And finished off with critique! 

At the end I even had these kids self-assess themselves with rubrics and give me notes for next year. One said to just go for the chromebook videos first. Might use that advice to see how it turns out. 
Yes, it has been done before but the reason I am deciding to post this project is due to my technology usage.

Monday, April 11, 2016

Pixel Art

Pixels! No not the movie, but the little dots that make up every image we show any student. Big or small they make it up. I wanted to do a more imaginative and self guided lesson with my 4th graders so I decided to do some pixel fun. Plus throw in some math and we had a good time. 


To start I had the students use a pre-marked up copied square I created for them. Each square had every 1 inch marked and was 10 x 10. So they should of ended up with 100 squares. From there I pre-cut up little squares of colored paper and let the students go to town.


My only few requirements were that their lines were straight, they did not cut any pieces in half and used at least 50% of their space. Also demonstrate craftsmanship with lining up those squares inside the space.  Some even got to making two.


I would totally do this project again, it only took two days for my students to do it. I would do more discussion and planning time for what they make next time. And really demonstrate how to line up that ruler better for lines. My students with more fine motor control issues did have some trouble with lining it up.

Thursday, February 11, 2016

Chuck Close Self-Portraits

I do portraits every year with just about all my grades, I don't with kindergarten because they do one with their teacher and I already have limited time with them. For my 3rd-5th I do artist inspired self-portraits and for 4th grade we do Chuck Close.

I pick Chuck Close because of many reasons. One of the big ones is actually his disability and how he over comes it. The students really pick up on it and seem interested in seeing that this person, found a way to work with how they are to be happy.

To start, we practice self-portraits. At this point this is their second year using a mirror to observe their facial structure. I add on to the portrait process by showing them a different way to do the nose and explain that the neck and head are actually the same thickness, it just appears smaller.
                                           
A new thing I did was have them use white boards I got from the glories dollar store and refresh their memory on how to do a self-portrait quickly. These whiteboards have been amazing.
                                               
SKETCHING


After we sketched and got a "good" self-portrait, I demonstrated the graphite transfer with tracing paper and pencils. I told them they can use it or not. But up to them. 


Next to be similar to Chuck Close, I have them paint their portrait with dots, due to fingers being to big for details. I have them add value with the dots by the eyes and neck area due to be an area there normally is a lot.

Once the portrait is done, we do the background. This can take a bit but I have them create a 2inch by 2 inch grid on 9x11 piece of paper (yes I know that doesn't make it even so one row is 2x1) This is where we incorporate the other technique by Chuck Close, the colors within colors. 

I use this as a way to explore warm/cool colors and build that color theory understanding. Plus craftsmanship is key. 


When all done with background, simply cut out portrait and glue onto background. DONE. 
When I put them up, I like to group them by warm or cool. Cool was the go to group this year. 


BONUS. My art museum has not only a Chuck Close, my husband who is 6'6" next to it, BUT has a sample of his work in progress. YAY

Saturday, September 19, 2015

BOWLS

For two years now my fourth graders have been taking part in Milwaukee Empty Bowls. An organziation that holds an annuel event selling bowls and funds go to local food pantries. This year due to the timing of it my school shall be holding our own selling event in honor. I also decide to do this to get the students more engaged and aware of the needs of others. So far so good. 


Here they are starting the bowls. I found slip molds the easiest and quickest method to achieve the form. First day student just simple focus on this task. I used these bowls I got from the dollar store and they worked well. 

Next week students go to decorate. I showed them three different methods of decoration. Additive, subtractive, and impressed. I also demonstrated how to add a foot as a bonus feature. I gave them complete decorative freedom but did warn to not over do it and to be careful to not go to deep. 


Down side to molding is breaking. I sadly did not remove the plastic bowl in time for this poor bowl. BUT luckily I was prepared and made extras and the student  was a trooper and came to decorate the extra. 


Now we dry and fire!


And success!! No one blew up! Once the bowls are fired, I use a small slow cooker I found to melt some wax and coat the bottom for glazing!

Glazing is one of my favorite things. It can be so much fun and I pretty much explain three simple rules for glazing. 1. Glaze the inside and edge first. 2. Don't waste glaze, it is not cheap. 3. Don't glaze the bottom. Even though there is wax, it breaks rule 2 to glaze the bottom.  But as I said, students go to town. I do put the glaze into 4 small bottles, one for each color and a set for each table, I found to spread at the tables. That way students have more access, share and don't steal from other tables. I do tell them they can mix BUT in water cups I have and not in the bottles. 

Before I fire though, I do a coat of clear onto some that might of missed some spots. But...

The end result is amazing. And I hope all sell.